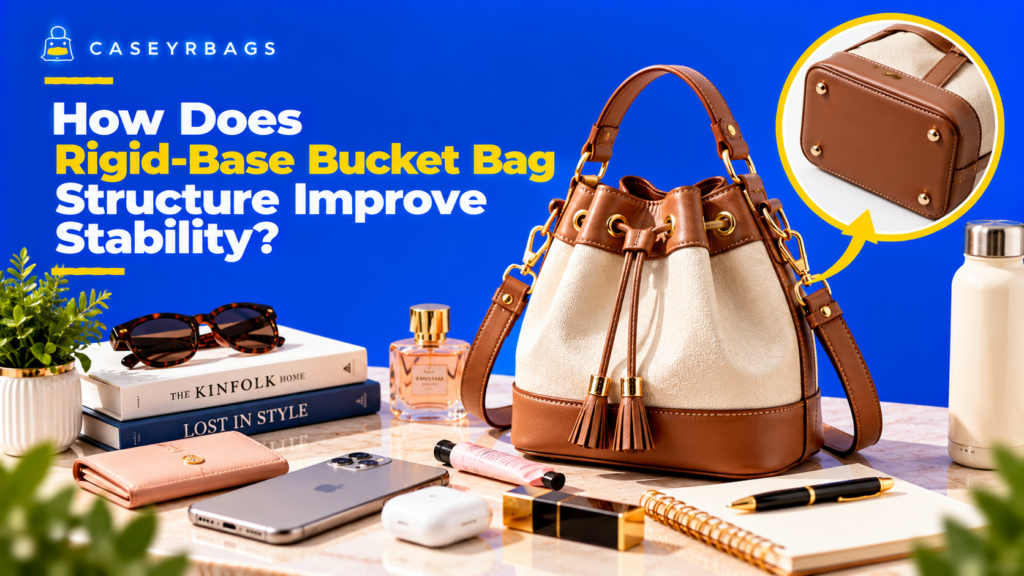
How Does Rigid-Base Bucket Bag Structure Improve Stability?
A Rigid-Base Bucket Bag improves stability by using a stiffened lower panel to preserve a recognizable footprint, spread concentrated loads, and reduce severe point sag when contents settle. The more controlled lower surface also gives the perimeter, seams, gussets, and flexible side walls a consistent structural boundary from which the loaded chamber can rise.
The useful target is controlled lower-body deformation, not maximum hardness. A balanced base makes standing and suspended behavior more predictable under the normal load while allowing the upper bag to remain flexible; an under-rigid base can collapse, whereas an over-rigid base can create an abrupt, box-like transition that does not suit the rest of the structure.
What Makes a Rigid-Base Bucket Bag More Stable?
A Rigid-Base Bucket Bag becomes more stable when its lower panel resists deformation more strongly than the flexible upper body, allowing the base to keep a recognizable footprint before and after normal contents are added. For the wider parent structure, see Bucket Bag.
That lower resistance spreads some localized demand across a broader contact area, so one dense or narrow object is less likely to create a severe point sag that dictates the whole bottom shape.
The governing principle is selective lower control: the base, perimeter, seams, gussets, and lower walls work together while the upper body and drawstring zone remain flexible enough to preserve Bucket Bag behavior.
Which Structural Effects Create Stability?
The four primary effects separately: preserved footprint, reduced severe point sag, broader load distribution, and more predictable lower-body shape. Tie each effect to an observable empty-versus-loaded change. Judge the effect from the actual lower geometry and the normal loaded state rather than from empty appearance or stiffness by touch alone.
No single effect proves the whole system stable. A bag may retain its base width but still tilt from edge loading, or reduce center sag while its perimeter twists; the combined evidence determines the outcome. Keep the same load and placement during retesting so structure, geometry, and load distribution remain distinguishable.
Which Components Work With the Rigid Base?
The reinforcement layer, base perimeter, base seam, side walls, gussets, lining, load placement, and suspension as connected components. Explain what structural role each contributes without turning the section into a manufacturing tutorial. Judge the effect from the actual lower geometry and the normal loaded state rather than from empty appearance or stiffness by touch alone.
Show the dependency chain: the panel defines resistance, the perimeter preserves the outline, the seam transfers that geometry, walls and gussets guide the chamber, and the load reveals whether those relationships remain controlled. Keep the same load and placement during retesting so structure, geometry, and load distribution remain distinguishable.
What Is the Correct Stability Principle?
A rigid base improves stability by controlling lower-body deformation, not by eliminating movement throughout the bag. Preserve the distinction between a stable lower foundation and a rigid entire shell. Judge the effect from the actual lower geometry and the normal loaded state rather than from empty appearance or stiffness by touch alone.
The principle into a decision: the structure passes when the normal load leaves the footprint recognizable, local sag controlled, edges aligned, and suspended lower shape predictable without requiring maximum stiffness. Keep the same load and placement during retesting so structure, geometry, and load distribution remain distinguishable.
How Do Footprint Retention, Point-Sag Control, and Load Spread Work Together?
Footprint retention, point-sag control, and load spreading are the core panel mechanics behind lower-body stability. They should be compared under the same bag shape, normal load, and item placement so the observed difference comes from structural response rather than a changed test condition. For the related upright behavior, see Rigid-Base Upright.
How Does Base Rigidity Preserve the Footprint?
A very soft base, whose center may drop and edges pull inward, with a controlled rigid base, whose width, depth, and perimeter remain more recognizable. Keep the same bag shape and normal load as the comparison basis. Judge the effect from the actual lower geometry and the normal loaded state rather than from empty appearance or stiffness by touch alone.
The footprint matters: it gives the rest of the chamber a more stable geometric reference. Add the trade-off that an excessively hard platform may preserve a fixed outline while reducing adaptability and increasing stiffness contrast with the walls. Keep the same load and placement during retesting so structure, geometry, and load distribution remain distinguishable.
How Does a Rigid Base Reduce Point Sag?
Point sag as localized downward deformation caused by a dense small object, narrow rigid item, or concentrated placement. Explain that a stiffened panel distributes part of this demand over a broader lower region. Judge the effect from the actual lower geometry and the normal loaded state rather than from empty appearance or stiffness by touch alone.
The boundary reduced point sag ≠ zero base deflection. Material behavior, reinforcement coverage, dimensions, item geometry, and placement still affect the result, so the same test item and position must be used in comparisons. Keep the same load and placement during retesting so structure, geometry, and load distribution remain distinguishable.
How Does Load Spreading Improve Lower-Body Stability?
Broader support can reduce isolated low points, produce a more even bottom silhouette, and make side-wall response more predictable. Use irregular items only as examples of how one object can otherwise dominate the lower shape. Judge the effect from the actual lower geometry and the normal loaded state rather than from empty appearance or stiffness by touch alone.
Explicitly reject the inference that load spreading creates a higher safe load capacity. The base may control shape more effectively without increasing the verified limits of seams, anchors, side walls, straps, or the complete bag. Keep the same load and placement during retesting so structure, geometry, and load distribution remain distinguishable.
How Do the Base Perimeter and Seams Transfer Stability?
The center panel cannot stabilize the whole lower body by itself. Perimeter definition and base-seam geometry transfer the lower outline into the walls and determine whether that controlled foundation reaches the rest of the chamber.
What Does the Base Perimeter Control?
The perimeter establishes lower width, lower depth, base outline, and the side-wall or gusset attachment path. A controlled center cannot preserve the intended footprint if the surrounding edge rolls, narrows, or distorts. Judge the effect from the actual lower geometry and the normal loaded state rather than from empty appearance or stiffness by touch alone.
Give the practical check: compare center and edge flexibility, inspect the outline from above, and observe whether all edges remain similarly aligned under the normal load. Do not equate a sharp-looking edge with proven control. Keep the same load and placement during retesting so structure, geometry, and load distribution remain distinguishable.
What Happens When the Center Is Stiff but the Perimeter Is Weak?
The directional failure: the center resists bending while an unsupported edge rolls or lifts, the attachment line changes, and the wall rises from an uneven boundary. The bag can therefore look stiff underneath yet twist or tilt when loaded. Judge the effect from the actual lower geometry and the normal loaded state rather than from empty appearance or stiffness by touch alone.
Show the cascade from mild to severe: small edge deformation → uneven seam path → asymmetrical wall pull → visible lower distortion → unstable standing or suspended behavior. State that the first correction is to identify the weak edge or uneven load, not to assume the center panel needs more hardness.
How Do Base Seams Affect Shape Transfer?
The base seam connects the panel and perimeter to a side wall or gusset, transferring the lower outline into the vertical chamber. Misalignment, puckering, stretching, or one-sided pull can weaken this geometric transfer even when the seam remains intact. Judge the effect from the actual lower geometry and the normal loaded state rather than from empty appearance or stiffness by touch alone.
Seam strength ≠ correct seam geometry. Do not infer durability failure from visible distortion alone, and do not infer stable geometry merely because the stitching appears heavy; evaluate alignment and loaded response separately. Keep the same load and placement during retesting so structure, geometry, and load distribution remain distinguishable.
How Do Side Walls, Gussets, and Lining Interact With the Rigid Base?
Flexible side walls, gussets, and lining must respond to the rigid lower boundary without becoming rigid themselves. Stability works best when the base controls the bottom geometry while the upper structure remains appropriately adaptable.
How Do Flexible Side Walls Use the Lower Boundary?
The rigid base gives the walls a more consistent lower attachment path and a predictable starting width. The walls may still flex, bulge moderately, and gather toward the opening without invalidating lower stability. Judge the effect from the actual lower geometry and the normal loaded state rather than from empty appearance or stiffness by touch alone.
The useful relationship as stable lower boundary + flexible upper body. If the lower footprint remains controlled while the upper bag responds normally to the load and drawstring, do not misclassify expected flexibility as structural failure. Keep the same load and placement during retesting so structure, geometry, and load distribution remain distinguishable.
How Do Gussets Guide Chamber Depth?
Gussets regulate base-to-wall transition, side expansion, and chamber depth. Controlled gussets can extend lower geometry upward; uneven gusset expansion can make one side project farther and create apparent twisting. Judge the effect from the actual lower geometry and the normal loaded state rather than from empty appearance or stiffness by touch alone.
The benefit with its limit: gussets should guide depth without converting the Bucket Bag into a rigid box. Evaluate both sides under the same load before attributing asymmetry to the base panel. Keep the same load and placement during retesting so structure, geometry, and load distribution remain distinguishable.
How Can Lining Support or Obscure Stability?
Well-fitted lining follows the base footprint and reduces false folds or item-trapping pockets, while loose lining can bunch over the panel and create misleading low points inside an otherwise stable structure. Judge the effect from the actual lower geometry and the normal loaded state rather than from empty appearance or stiffness by touch alone.
The hierarchy: lining affects interior usability and observation, but the structural panel remains the primary lower stabilizer. Move the lining aside during inspection where possible, then evaluate the bag again under the normal load. Keep the same load and placement during retesting so structure, geometry, and load distribution remain distinguishable.
How Do Item Settlement and Dense-Item Placement Affect Stability?
A stable base changes how contents settle, but it does not cancel load placement. Centered or distributed contents can work with the lower foundation, while dense edge loading can still create tilt, edge lift, or asymmetric wall pressure.
How Does the Lower Surface Change Item Settlement?
A sagging base, where objects converge toward the lowest point and may overlap or tilt inward, with a flatter controlled surface that supports broader distribution and more predictable upright placement. Judge the effect from the actual lower geometry and the normal loaded state rather than from empty appearance or stiffness by touch alone.
Stable base ≠ fixed contents. Smooth surfaces, movement, item shapes, open space, and the absence of internal organization can still allow migration; the base controls the foundation rather than locking every object in place. Keep the same load and placement during retesting so structure, geometry, and load distribution remain distinguishable.
What Happens When a Dense Item Sits Near One Edge?
An off-center dense item places greater demand on one portion of the base, can lift or unload the opposite edge, and may pull the adjacent wall outward. A rigid panel reduces local collapse but cannot erase asymmetrical loading. Judge the effect from the actual lower geometry and the normal loaded state rather than from empty appearance or stiffness by touch alone.
A controlled comparison between centered and edge placement using the same item and remaining contents. If tilt changes materially while the base construction stays fixed, identify load distribution as the stronger cause. Keep the same load and placement during retesting so structure, geometry, and load distribution remain distinguishable.
Which Load Pattern Produces the Most Predictable Result?
A centered moderate load or a deliberately distributed set of contents usually lets the entire lower structure participate. Avoid presenting one packing pattern as universal; the relevant test uses the reader’s normal contents and bag geometry. Judge the effect from the actual lower geometry and the normal loaded state rather than from empty appearance or stiffness by touch alone.
The decision rule: rigidity works best with controlled load distribution rather than as a substitute for it. If stability requires chronic overfilling, forced wedging, or perfect item placement, record a system mismatch rather than a clean pass. Keep the same load and placement during retesting so structure, geometry, and load distribution remain distinguishable.
| Load Pattern | Base Response | Footprint Effect | Tilt Risk | Side-Wall Response | Outcome |
|---|---|---|---|---|---|
| Centered moderate load | Distributed | Recognizable | Low–moderate | Even expansion | Balanced candidate |
| Distributed load | Broad participation | Controlled | Low | Predictable | Balanced |
| Dense edge load | Asymmetric | Possible edge lift | Higher | One-sided pull | Load mismatch |
| Overfilled uneven load | Perimeter stressed | Distorted | High | Bulge / twist | Depth mismatch |
How Do Base Width, Shape, Loaded Depth, and Overfilling Affect Stability?
Base width, footprint shape, loaded depth, and overfilling change how demand reaches the perimeter and walls. A broader or harder base is not automatically more stable; geometry and load interaction determine the useful result.
Does a Broader Base Always Improve Stability?
A broader footprint can provide more lower support area, enable side-by-side item placement, and reduce central clustering. Its value depends on stiffness, perimeter control, wall span, and the intended load. Judge the effect from the actual lower geometry and the normal loaded state rather than from empty appearance or stiffness by touch alone.
The trade-off: a very broad base creates a larger exterior profile and longer unsupported spans that may require more control. Preserve wider base ≠ automatically more stable and compare behavior rather than width alone. Keep the same load and placement during retesting so structure, geometry, and load distribution remain distinguishable.
How Do Round and Elongated Footprints Behave Differently?
A rounded base distributes placement around a central footprint and reduces sharp corners, while an elongated oval creates a longer axis that supports directional placement and may respond differently to off-axis loads. Judge the effect from the actual lower geometry and the normal loaded state rather than from empty appearance or stiffness by touch alone.
Do not declare one shape universally best. Evaluate shape together with panel resistance, perimeter alignment, wall geometry, item arrangement, and carry orientation; the same footprint may pass one load and tilt under another. Keep the same load and placement during retesting so structure, geometry, and load distribution remain distinguishable.
When Do Loaded Depth and Overfilling Overwhelm Base Control?
Increasing loaded depth pushes walls farther outward, shifts the suspended center, increases pressure across the perimeter, and can reduce flat surface contact. The base can control the lower outline only to the extent the complete geometry remains manageable. Judge the effect from the actual lower geometry and the normal loaded state rather than from empty appearance or stiffness by touch alone.
The cascade: overfill → strong wall bulge → uneven perimeter demand → edge lift or distortion → weaker standing and suspended predictability. Maintain rigid base control ≠ unlimited loaded-depth control. Keep the same load and placement during retesting so structure, geometry, and load distribution remain distinguishable.
How Is Standing Stability Different From Suspended Stability?
Standing stability and suspended stability test different conditions. Surface contact can help the bag rest upright, while lifting removes that support and introduces handle or strap forces, gravity, and movement-driven load shift.
What Does Standing Stability Actually Test?
Standing behavior mainly tests base contact, footprint flatness, and the loaded center relative to the support surface. A controlled rigid base can broaden contact and reduce bottom collapse, improving the probability of an upright resting posture. Judge the effect from the actual lower geometry and the normal loaded state rather than from empty appearance or stiffness by touch alone.
The remaining causes of tipping: top-heavy contents, uneven loading, a narrow footprint, soft-wall collapse, an uneven surface, or a shifted load center. Preserve rigid base ≠ guaranteed self-standing bag. For the focused conditions behind upright resting behavior, direct the reader to Why does a Rigid-Base Bucket Bag remain upright. For the focused upright-behavior conditions, see Why does a Rigid-Base Bucket Bag remain upright.
What Changes When the Bag Is Lifted?
Lifting removes surface support and introduces suspension force through the handle or strap. The lower footprint may remain recognizable while wall angles, upper-body slouch, and item positions respond to gravity and the carry point. Judge the effect from the actual lower geometry and the normal loaded state rather than from empty appearance or stiffness by touch alone.
Useful suspended stability as predictable lower geometry under the normal load, not a frozen silhouette. Evaluate whether the base twists, tilts, folds, or loses its outline after lifting rather than expecting the full standing shape to remain unchanged. Keep the same load and placement during retesting so structure, geometry, and load distribution remain distinguishable.
Why Must Movement Be Evaluated Separately?
Walking adds repeated acceleration, directional changes, strap pull, and internal load shift. A bag that looks stable while held still may show edge lift, tilt, item pooling, or wall deformation after ordinary movement. Judge the effect from the actual lower geometry and the normal loaded state rather than from empty appearance or stiffness by touch alone.
Three separate observations—standing, lifted and still, then moving—using the same load and carry point. If only the tabletop state passes, classify the result as Standing-Only Stability rather than complete loaded stability. Keep the same load and placement during retesting so structure, geometry, and load distribution remain distinguishable.
| Variable | Standing | Lifted | Moving Carry |
|---|---|---|---|
| Support surface | Present | Removed | Removed |
| Load center | Compared with footprint | Responds to suspension point | Shifts dynamically |
| Suspension force | None | Handle/strap active | Repeated directional pull |
| Movement | Minimal | Still | Ongoing |
| Wall response | Resting shape | Gravity-led flex | Flex + load shift |
| Evidence value | Resting behavior | Carried-shape evidence | Dynamic stability |
How Does the Rigid Base Affect the Flexible Upper Body and Drawstring Zone?
The rigid base affects the upper body only indirectly through lower geometry and item settlement. It can preserve a predictable foundation without controlling every wall fold, upper-body slouch, or drawstring action.
Which Lower Features Can Remain Controlled After Lifting?
A well-matched base can preserve lower width, footprint recognition, and the geometry of the lowest chamber after suspension. These effects give flexible walls a more predictable boundary even when their upper portions continue to move. Judge the effect from the actual lower geometry and the normal loaded state rather than from empty appearance or stiffness by touch alone.
The limit: the base does not directly control every wall fold, upper-body slouch, handle pull, or drawstring gather. Diagnose a stable base with unstable upper walls as a separate system outcome rather than automatically demanding a harder base. Keep the same load and placement during retesting so structure, geometry, and load distribution remain distinguishable.
How Can Predictable Item Settlement Support the Opening Indirectly?
When contents settle on a flatter lower surface instead of collapsing into one deep low point, their loaded height and distribution may become more predictable. That can help preserve clearance near the upper gathering zone. Judge the effect from the actual lower geometry and the normal loaded state rather than from empty appearance or stiffness by touch alone.
Avoid claiming that the base improves closure security or guarantees easier access. The base shapes lower load geometry; the drawstring independently controls the opening, and bulky or overfilled contents can still interfere with closure. Keep the same load and placement during retesting so structure, geometry, and load distribution remain distinguishable.
Which Structural Boundary Must Remain Explicit?
Base support ≠ drawstring control. Use the lower structure only to explain footprint, settlement, and wall foundation; reserve closure tightness, retention, and opening mechanics for their dedicated article context. Judge the effect from the actual lower geometry and the normal loaded state rather than from empty appearance or stiffness by touch alone.
Give the practical implication: if the lower bag remains predictable but the opening gathers poorly, inspect loaded height, wall material, cord path, and closure design rather than treating the base as the default cause. Reconnect these separate mechanisms through the complete Bucket Bag: Drawstring Access and Base-Stabilized Capacity definition without merging their functions. Reconnect the lower and upper mechanisms through Bucket Bag: Drawstring Access and Base-Stabilized Capacity.
When Is Base Rigidity Too Low, Balanced, or Excessive?
Useful rigidity exists within a range. Too little control allows collapse and sag, while excessive hardness can dominate the bag, reduce adaptability, and create an abrupt transition into flexible walls.
Which Signs Indicate an Under-Rigid Base?
Strong center sag, a collapsed or narrowing footprint, edge roll, lower twisting, and a normal load that repeatedly erases the intended base shape. Connect these observations to item pooling, inward tilt, or inconsistent wall rise. Judge the effect from the actual lower geometry and the normal loaded state rather than from empty appearance or stiffness by touch alone.
The threshold conditionally: the base is under-rigid when the normal load repeatedly produces excessive lower deformation for the intended structure. Do not use one press test or softness by touch as the only evidence. Keep the same load and placement during retesting so structure, geometry, and load distribution remain distinguishable.
Which Signs Indicate Excessive Rigidity?
A hard platform that dominates the bag, reduced lower adaptability, a visibly abrupt transition into soft walls, localized hinge folds, or a box-like base inconsistent with the intended Bucket Bag behavior. Judge the effect from the actual lower geometry and the normal loaded state rather than from empty appearance or stiffness by touch alone.
Excessive rigidity can preserve a footprint yet weaken structural harmony. More hardness becomes a failure when its transition costs, mass, inflexibility, or concentrated wall folds outweigh the added deformation control. Keep the same load and placement during retesting so structure, geometry, and load distribution remain distinguishable.
What Defines a Balanced Base?
Balance as enough resistance to retain the footprint, limit severe local sag, keep the perimeter aligned, and support predictable standing and suspended lower shape under the normal load. Judge the effect from the actual lower geometry and the normal loaded state rather than from empty appearance or stiffness by touch alone.
The upper structure to remain appropriately flexible and the base-to-wall transition to remain controlled. The correct outcome is a functional range, not a universal stiffness number or a claim that the hardest sample wins. Keep the same load and placement during retesting so structure, geometry, and load distribution remain distinguishable.
| Variable | Under-Rigid | Balanced | Over-Rigid |
|---|---|---|---|
| Footprint | Collapses / narrows | Recognizable | Fixed |
| Center deflection | High | Controlled | Very low |
| Perimeter | Roll risk | Aligned | Abrupt transition risk |
| Wall transition | Weak support | Progressive | Hinge-fold risk |
| Adaptability | High but unstable | Balanced | Reduced |
| Failure risk | Sag / twist | Lowest when matched | Box-like behavior |
How Do Stiffness Transition and Material Thickness Affect Stability?
The base-to-wall stiffness transition matters because load transfer occurs across that boundary. Thickness can influence response, but material, layering, reinforcement coverage, seam alignment, and attachment determine how stiffness is actually expressed.
What Happens With a Gradual Base-to-Wall Transition?
A gradual change in stiffness can spread load transfer over a broader region, allow the wall to flex progressively, and reduce a single hard hinge line at the perimeter. Judge the effect from the actual lower geometry and the normal loaded state rather than from empty appearance or stiffness by touch alone.
Avoid treating gradual transition as automatically superior. It still depends on aligned seams, controlled reinforcement coverage, wall geometry, and the load; validate the actual fold and bulge pattern rather than inferring performance from construction language. Keep the same load and placement during retesting so structure, geometry, and load distribution remain distinguishable.
What Happens With an Abrupt Transition?
A strong contrast between a very hard base and a soft wall can concentrate bending near the attachment line. The result may appear as a hard crease, localized buckling, wall flare, or repeated distortion above the perimeter. Judge the effect from the actual lower geometry and the normal loaded state rather than from empty appearance or stiffness by touch alone.
Show the failure cascade: maximum panel stiffness → concentrated transition movement → hinge fold → uneven wall response → reduced suspended predictability. The correction hypothesis is to isolate the transition behavior, not automatically add more reinforcement. Keep the same load and placement during retesting so structure, geometry, and load distribution remain distinguishable.
Does a Thicker Base Always Perform Better?
Thickness may influence bending resistance, compressibility, and mass, but different materials and layered constructions can behave very differently at similar thicknesses. Reinforcement coverage and attachment also change the observed response. Judge the effect from the actual lower geometry and the normal loaded state rather than from empty appearance or stiffness by touch alone.
Behavior-based evidence: compare center and edge deflection, footprint retention, load spread, and transition folds under fixed conditions. Maintain thickness ≠ stiffness ≠ complete stability. Keep the same load and placement during retesting so structure, geometry, and load distribution remain distinguishable.
What Can and Cannot Rigid-Base Structure Prove?
Rigid-base evidence supports lower shape-control claims only within the tested conditions. It does not by itself establish higher safe load capacity, durability, guaranteed self-standing behavior, comfort, or protection.
Does Base Rigidity Increase Safe Load Capacity?
A rigid base can improve shape control, distribute localized pressure, and reduce visible sag. These outcomes describe geometry under a tested load; they do not certify how much total load the bag can safely carry. Judge the effect from the actual lower geometry and the normal loaded state rather than from empty appearance or stiffness by touch alone.
The other capacity variables: materials, seams, anchors, walls, gussets, handles or straps, reinforcement, and construction quality. Require an official rating or validated complete-system test before making a safe-load claim. Keep the same load and placement during retesting so structure, geometry, and load distribution remain distinguishable.
Does Base Reinforcement Prevent Seam or Durability Failure?
Reinforcement may reduce some deformation but can also move stress toward edges, seams, or attachment points. A stable-looking panel therefore does not prove that surrounding components will resist repeated use indefinitely. Judge the effect from the actual lower geometry and the normal loaded state rather than from empty appearance or stiffness by touch alone.
Performance timescales separate: an immediate loaded-shape observation supports a stability statement, not a long-term durability guarantee. Use direct wear evidence and construction-specific sources for durability claims. Keep the same load and placement during retesting so structure, geometry, and load distribution remain distinguishable.
Which Other Claims Must Remain Limited?
Base stability does not guarantee upright standing, fixed contents, zero movement, protected contents, comfortable carry, balanced posture, or immunity to overfilling. Each outcome depends on additional components and conditions. Judge the effect from the actual lower geometry and the normal loaded state rather than from empty appearance or stiffness by touch alone.
End with the permitted claim range: the base can be described as improving lower footprint control and reducing severe deformation under the observed test conditions. Do not extend that evidence into unrelated safety, protection, comfort, or durability conclusions. Keep the same load and placement during retesting so structure, geometry, and load distribution remain distinguishable.
How Should Rigid-Base Bucket Bag Stability Be Diagnosed and Evaluated?
The final evaluation should isolate the first failing structural layer while preserving fixed controls. The same surface, representative dense item, remaining contents, placement map, carry point, and movement sequence should be used from empty inspection through the final outcome.
Which Symptom Points to Which Structural Layer?
Map strong center sag to panel resistance or reinforcement coverage; edge lift or twisting to perimeter, seam, base shape, or uneven loading; side-wall bulge to loaded depth, gussets, or wall behavior; and standing-only stability to suspension or load shift. Judge the effect from the actual lower geometry and the normal loaded state rather than from empty appearance or stiffness by touch alone.
Competing-cause checks before assigning blame. Center the dense item, hold the remaining load constant, compare both edges, inspect the seam and wall transition, and change only one variable so the first failed mechanism can be identified. Keep the same load and placement during retesting so structure, geometry, and load distribution remain distinguishable.
What Should Be Inspected Before and After Loading?
Before loading, inspect the base outline, center and edge flexibility, perimeter, seam alignment, base-to-wall transition, gussets, lining, and unloaded surface contact. Record what is observed without assigning a performance claim yet. Judge the effect from the actual lower geometry and the normal loaded state rather than from empty appearance or stiffness by touch alone.
After loading, observe footprint retention, local sag, edge lift, tilt, wall bulge, item settlement, standing posture, lifted lower shape, and post-movement change. Use the same surface, contents, placement, carry point, and movement path for comparisons. Keep the same load and placement during retesting so structure, geometry, and load distribution remain distinguishable.
Which 20-Step Sequence Determines the Final Outcome?
This fixed sequence: (1) empty the bag; (2) place it on a level surface; (3) record the unloaded footprint; (4) press the center lightly; (5) compare center and edge response; (6) inspect the perimeter; (7) inspect the base seam; (8) inspect base-to-wall transitions; (9) add one representative dense item; (10) observe local sag; (11) add the normal remaining contents; (12) let the load settle; (13) check footprint retention; (14) check edge lift or twisting; (15) inspect wall bulging; (16) observe standing behavior; (17) lift from the normal carry point; (18) observe suspended lower shape; (19) move normally and recheck the load and base; (20) assign the outcome from the combined evidence.
Select Balanced Rigid-Base Stability only when the normal load leaves the footprint recognizable, severe local sag controlled, the perimeter aligned, tilt manageable, and the suspended lower shape predictable without excessive hardness. Otherwise select the first supported mismatch—Under-Rigid, Over-Rigid, Perimeter/Seam, Transition, Load-Distribution, Loaded-Depth, Standing-Only, or Stable Base / Unstable Upper Body—and state the remaining uncertainty.
- empty the bag
- place it on a level surface
- record the unloaded footprint
- press the center lightly
- compare center and edge response
- inspect the perimeter
- inspect the base seam
- inspect base-to-wall transitions
- add one representative dense item
- observe local sag
- add the normal remaining contents
- let the load settle
- check footprint retention
- check edge lift or twisting
- inspect wall bulging
- observe standing behavior
- lift from the normal carry point
- observe suspended lower shape
- move normally and recheck the load and base
- assign the outcome from the combined evidence
- The H1 is answered directly in two concise production paragraphs.
- One disclaimer follows the H1 production copy.
- Technical Blogpost Mode leads; diagnostic support remains secondary.
- The central entity stays Rigid-Base Bucket Bag structural stability.
- Stability is defined as controlled loaded behavior rather than zero movement.
- Rigid base is not confused with a rigid entire bag.
- Base rigidity is not treated as verified load capacity.
- The base footprint is evaluated under empty and normal-load states.
- Center deflection and edge behavior are evaluated separately.
- Point-load sag and load spreading are explained causally.
- Reduced sag is not described as zero deflection.
- Panel stiffness and perimeter control remain distinct.
- Base seams are evaluated for geometry as well as visible construction.
- Seam strength is not treated as correct seam geometry.
- Side walls remain flexible where the bag type requires flexibility.
- Gusset behavior and loaded depth are evaluated.
- Lining is treated as secondary rather than the primary stabilizer.
- Item settlement is observed without claiming fixed contents.
- Dense-item placement and load distribution are tested.
- Wider or harder bases are not automatically treated as better.
- Base shape is interpreted with load and wall geometry.
- Overfilling and its failure cascade are explicit.
- Standing stability and suspended stability remain separate.
- Movement is included after the lifted still-state observation.
- Drawstring control remains separate from base support.
- Under-rigid, balanced, and over-rigid conditions are defined.
- Base-to-wall stiffness transition is evaluated.
- Thickness is not used as a complete stiffness or stability proxy.
- Durability, protection, comfort, and self-standing claims stay within evidence.
- Diagnosis checks competing causes and changes one variable at a time.
- The final protocol preserves fixed controls and the normal daily load.
- Outcomes are explicit and mechanically justified.
- The conclusion preserves upper flexibility and rejects maximum rigidity as the target.
- Exactly nine proof assets are specified and only four are SVGs.
- The approved upward and lateral links each appear once with their exact anchors and destinations; no unapproved reader-facing link is inserted.
- The article ends with a qualified, falsifiable stability conclusion.
Conclusion
A Rigid-Base Bucket Bag improves stability when its stiffened lower panel preserves a recognizable footprint, spreads localized loads, reduces severe point sag and twisting, and gives the perimeter, seams, gussets, and side walls a predictable lower geometry under the normal load.
The correct target is enough lower rigidity to control the normal load while preserving appropriate upper flexibility. Maximum hardness, empty self-standing appearance, or visible thickness cannot replace complete loaded-system evidence across standing, suspended, and movement states.
FAQs
Does a Rigid Base Make a Bucket Bag Stand Upright?
A flat, controlled base can improve surface contact and reduce bottom collapse, which may make upright resting more likely. Base width, load distribution, wall structure, surface level, and the loaded center still affect whether the bag stands.
Rigid base ≠ guaranteed self-standing bag. Standing is one observation only; lift and move the normally loaded bag before concluding that the complete structure is stable.
Is a Harder Bucket Bag Base Always More Stable?
Greater stiffness can reduce sag and preserve the footprint, but excessive rigidity can create a hard lower profile, reduce adaptability, and concentrate folds at the base-to-wall transition.
The target as balanced rigidity: enough lower resistance for predictable loaded behavior without dominating the flexible upper structure. Do not rank bases by hardness alone.
Does a Rigid Base Let a Bucket Bag Carry More Weight?
Base stiffness can spread localized pressure and improve shape control under an observed load, but it does not establish a higher safe working load.
Overall capacity depends on materials, seams, anchors, walls, gussets, handles or straps, reinforcement, and construction quality. Require an official rating or validated complete-system evidence before making a load-capacity claim.
One Response